
Pavers Ideas
Where a Parkland Paver Driveway Crosses the Sidewalk
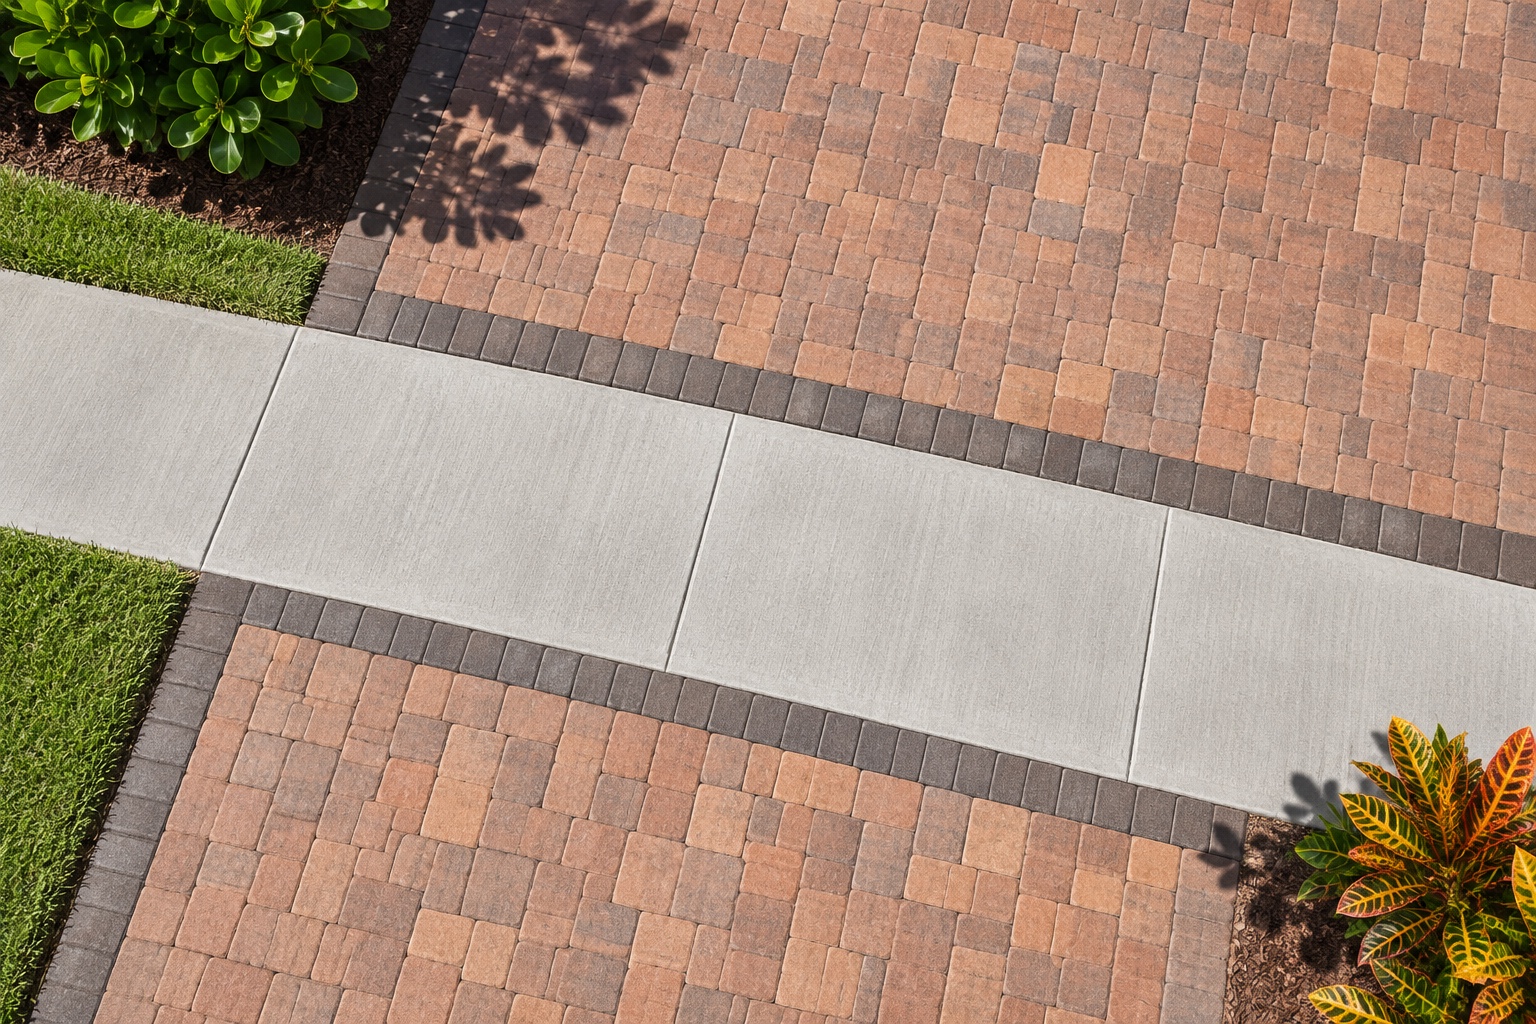
Treat the sidewalk crossing as its own specified part of a Parkland paver driveway plan. The city’s checklist requires sidewalks at driveway areas to be 6 inches thick with welded wire mesh. Show that crossing separately in the submitted design, alongside the private paver assembly and the point where the materials meet. Continuous color and pattern can tie the entrance together once those separate construction details are resolved. Settle the crossing detail before choosing how the border runs through the entrance.
For paver driveway and outdoor living work in Parkland, start with the survey and a close look at the existing sidewalk. Your tires cross that seam on the way in, and neighbors walk across it along the sidewalk. Review material samples with that location marked on the plan.
Locate the crossing on the survey
The city’s Driveway / Pavers / Concrete Slab Checklist lists paver driveways, concrete driveways and sidewalks separately. For a paver driveway, it directs the applicant to indicate pavers on the survey plan. The survey must also show the total proposed surface area, driveway width and distances to property lines and setbacks. Those dimensions establish the footprint you are discussing.
The sidewalk entry adds the 6-inch thickness and welded wire mesh requirement at driveway areas. The concrete driveway entry separately calls for a cut section on the survey showing concrete thickness, reinforcement type and a thickened edge if one will be installed. Each entry concerns a particular part or material. A useful design follows that separation and identifies the sidewalk crossing explicitly.
As a practical step, have the drawing show where the private pavers stop, where the sidewalk portion begins and how the two meet. Any proposed treatment of that sidewalk portion belongs in the city’s review of the design. The contractor can then relate the surface selection to the construction detail for that location.
This is also where walkway and driveway pavers installation needs a coordinated layout. A person following the sidewalk travels across the entrance; a car travels along it. Both routes pass through the same small piece of ground. Marking it clearly on the survey keeps that shared area visible throughout the design discussion.
Give the material joint its own construction detail
From standing height, a row of dark pavers beside pale concrete looks like a border. Below the surface, the edge needs support. Walking along that seam, you can see every individual unit that needs to be held in place against the concrete.
CMHA’s Edge Restraints for Interlocking Concrete Pavements calls for restraints around the perimeter and at changes in surface material. Restraints hold the pavers together against horizontal forces from traffic. Flat metal or plastic landscape edging does not provide the lateral support needed for that job.
The same publication identifies poured concrete curbs as suitable restraints and stresses thorough compaction of the soil and base beside them to prevent settlement. Applying that guidance at a sidewalk joint takes a designed connection. The designer needs to establish which element provides restraint and how it supports the adjoining pavers. A visible concrete edge gives the team a location to examine; its suitability depends on the actual detail.
CMHA’s Construction of Interlocking Concrete Pavements describes the base, edge restraints, bedding sand, pavers and filled joints as parts of the installation. At the crossing, the drawing should carry that assembly to its termination and show its relationship to the sidewalk. The supporting layers deserve attention all the way to the last row.
During a plan review, trace the edge of the paver field until it reaches the crossing. The restraint should be identifiable at that point, along with the base and sidewalk construction. A close drawing of this joint gives the installer a reference for where the two assemblies meet.
Choose a border that ends cleanly at the sidewalk
Once the crossing construction is addressed, the visual decisions become easier. A dark border can outline a warm field of pavers and give it a deliberate ending beside light concrete. The sidewalk stays readable as a continuous band across the entrance. Repeating a border color elsewhere in the private driveway can keep the whole layout related.
For driveway pavers design and installation, look at the layout where the pattern reaches the sidewalk, especially the cuts at the edge. A large color rendering can make every joint seem even. A closer layout shows the actual pieces that will finish the field and where the border turns. Those are the details you will see while pulling in or walking out to the street.
Two sketches with the same paver color can produce different entrances. One might bring a strong charcoal border to the concrete; another might use a border closer in tone to the main field. The first emphasizes the material change. The second makes the paver area quieter. Compare those choices with the crossing drawn in place, at the same scale, so the decision reflects the entrance you will build.
Contact Perfect Pavers with your survey and photos looking along the sidewalk and across the driveway. We can discuss the material junction, the border you prefer and the information needed to develop the layout. Include a close view of each end of the crossing so the conversation covers the transition as well as the larger entrance.
A visible border in our Broward County work
Our Broward County residence paver walkway offers a clear visual example of a border following a change of direction. Small gray modular pavers lead toward a dark front door. A charcoal border follows the right-angle turn beside the white wall, with lawn along the walk. The darker units make the edge easy to follow through the turn.
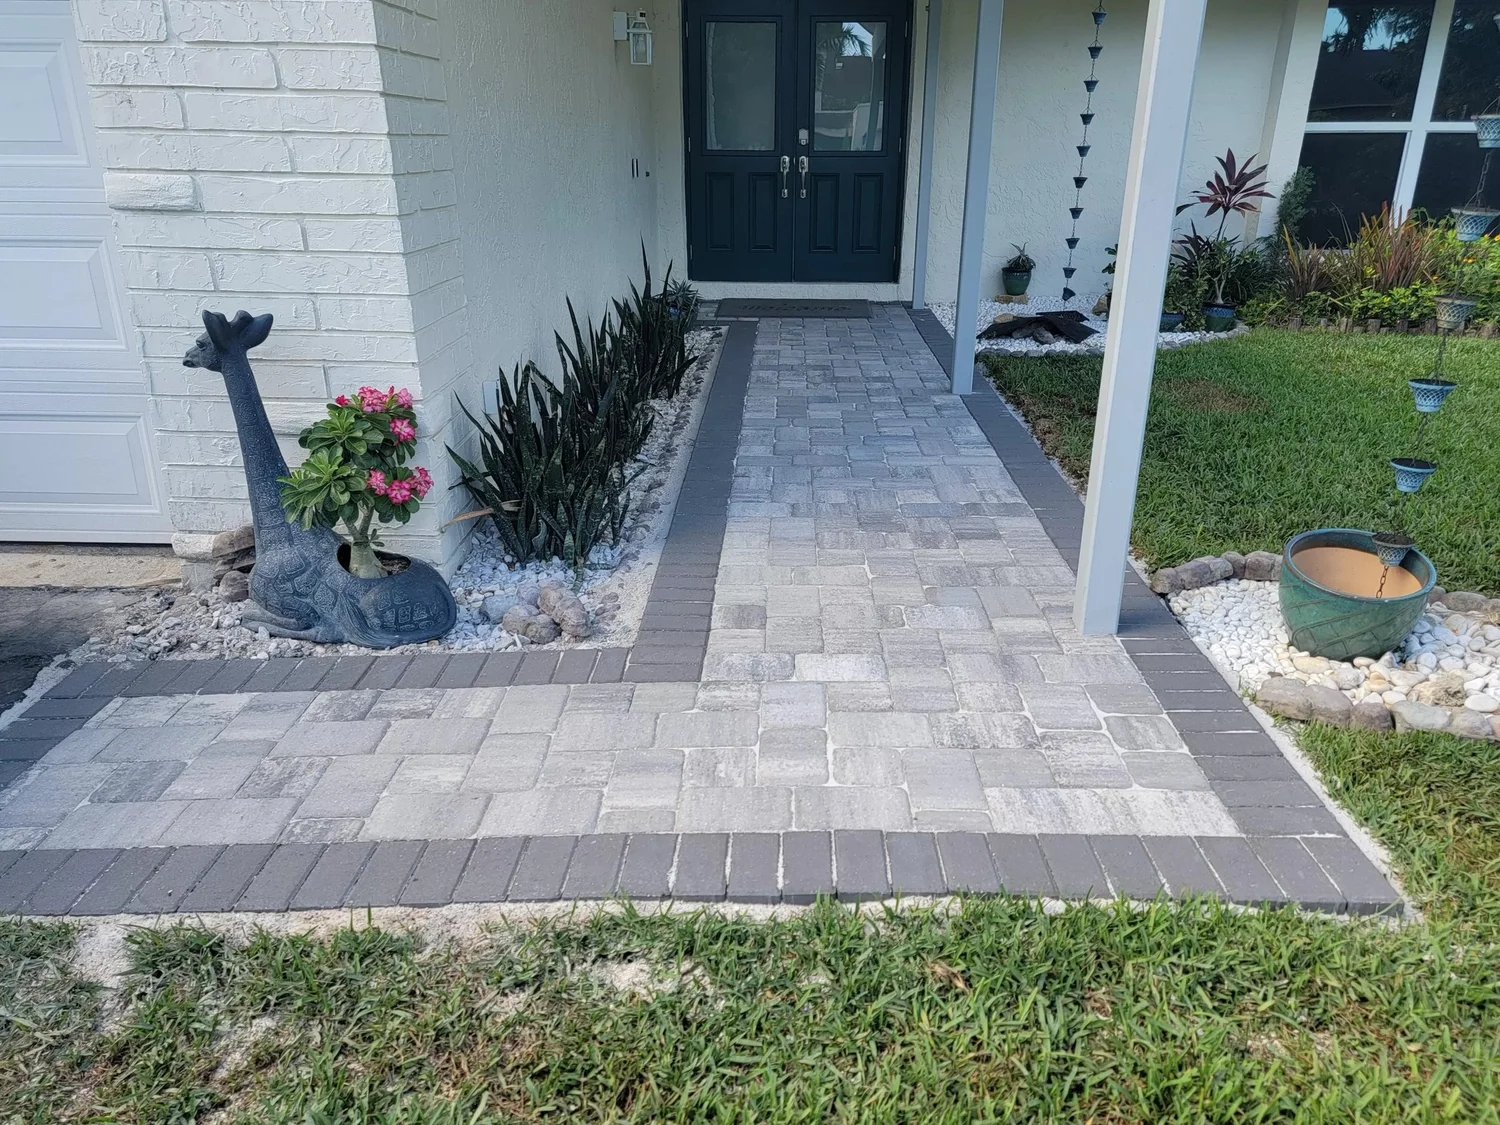
Broward County residence: the charcoal border follows the right-angle turn in this private front walk.
For your driveway drawing, a similarly deliberate border can organize the private surface as it approaches the separately specified sidewalk crossing. The photo provides a reference for color and direction; the construction detail for your crossing comes from your own proposed design and municipal review.
Make the scope describe the joint you chose
A driveway proposal becomes easier to evaluate when you can match its descriptions to locations on the survey. The private paver area, the sidewalk crossing and the connection between them should each have an identifiable place in the planned work. This gives you a way to compare the drawing with the contractor’s written scope before committing to a finish.
Start with the boundary of the work. A line on the survey should make the proposed extent clear wherever the driveway meets the sidewalk. Then look at the materials assigned to those areas and the detail for the paver edge. The description should be specific enough for you to locate the transition in both documents.
The layout also needs to show how the selected border finishes against the crossing. That is a small area of the total entrance, but it contains a material change, the end of the paver pattern and a support detail. Giving it a separate description lets you discuss those decisions while the design is still on paper. It also helps you understand what the quoted work includes.
For the document sequence surrounding the project, our guide to Notice of Commencement requirements for Parkland pavers projects covers that separate subject. Keep the crossing drawing with the agreed scope so the physical work remains clear as the project moves through its administrative steps.
Bring your survey, crossing photos and preferred paver colors to Perfect Pavers to discuss your Parkland driveway and outdoor living project. We can review where the proposed surfaces meet and identify what needs to be resolved in the design. Your next step is a layout and scope discussion that includes the sidewalk crossing, its adjoining paver edges and the border you want to see at the entrance.